
-
-
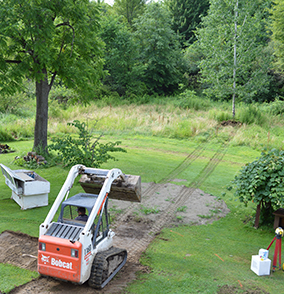
Step 1 - Marking your yard
Before I arrive for the installation, I would ask that you identify a few important areas in your yard. First, identify where you want the pool to be by marking the center location of the pool. Next, mark an area where you would like the top soil placed while leveling for the pool. In the photo to the left, you will see that the "dump" pile on this job is in the back of the yard by a tree while the new pool location is where the Bobcat is located.
-
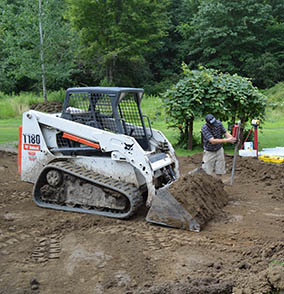
Step 2 - Leveling for the pool
This is probably the most critical step in the process and often the hardest to get done correctly. Each yard offers a different challenge when it comes to proper leveling for the pool base. Because of this, I utlize machinery and custom leveling equipment that ensures a level, solid base for your pool. The process results in a pool base that is level and ready for the pool walls. You can see a video of this process by checking out our YouTube channel by clicking on the logo below.

-
-
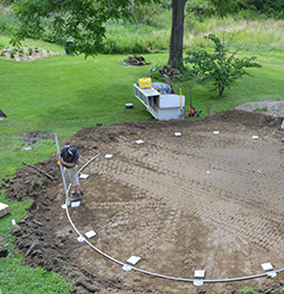
Step 3 - Leveling pool wall supports
Once the finished pool base is established and level, the supports for the pool wall are set. In this photo, you can see the lower wall support ring as well as the foundation blocks used to support the pool wall pillars being set in place. Each one is leveled and tamped to provide a solid foundation for the pool wall and supporting structure.
-
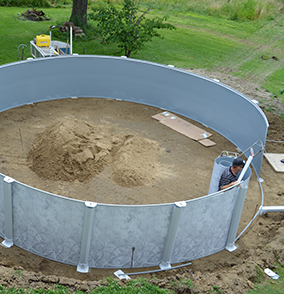
Step 4 - Installing the pool walls and supports
Now that the pool base and foundation is solid and level, the installation of the pool walls begins. Although there are subtle differences in pool construction from one manufacturer to the next, most follow similar processes and utilize a coiled wall and support system. This photo illustrated a typical example of what you will see most often.
Step 5 - Skimmer install and liner prep
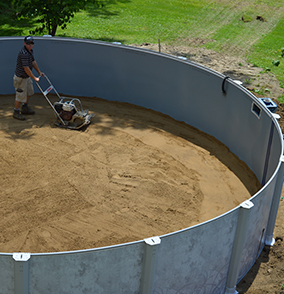
Installation includes a sand base to smooth out the pool bottom surface. I use a power plate compactor to level the surface under the liner and create a uniform feel underfoot. I'ts also at this point when the pool skimmer assembly and return lines are installed in the pool wall. Optionally, you may elect to upgrade to a foam core pad under the liner for an even more supportive feel. Pricing for this option varies based on pool size. Please contact me prior to installation for pricing if interested in this option.
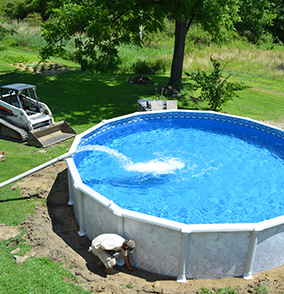
Step 6 - Liner install and filling the pool
Once the liner is installed, the top cap is secured and the pool is ready for water! At this point, any air trapped between the liner and pool wall is being removed to quarentee a tight fit and remove any visible wrinkles in the liner prior to filling. Depending on your pool size and water source, the filling process can take up to 36 hours or more.